
A Quick How to Guide on Fancy Lettering
-
Calligraphy is a fantastic skill to have as it is great for making birthday cards, bullet journaling, school projects, etc. It may seem complicated at first, but after time and practice, you’ll be writing in fancy lettering in no time.

-
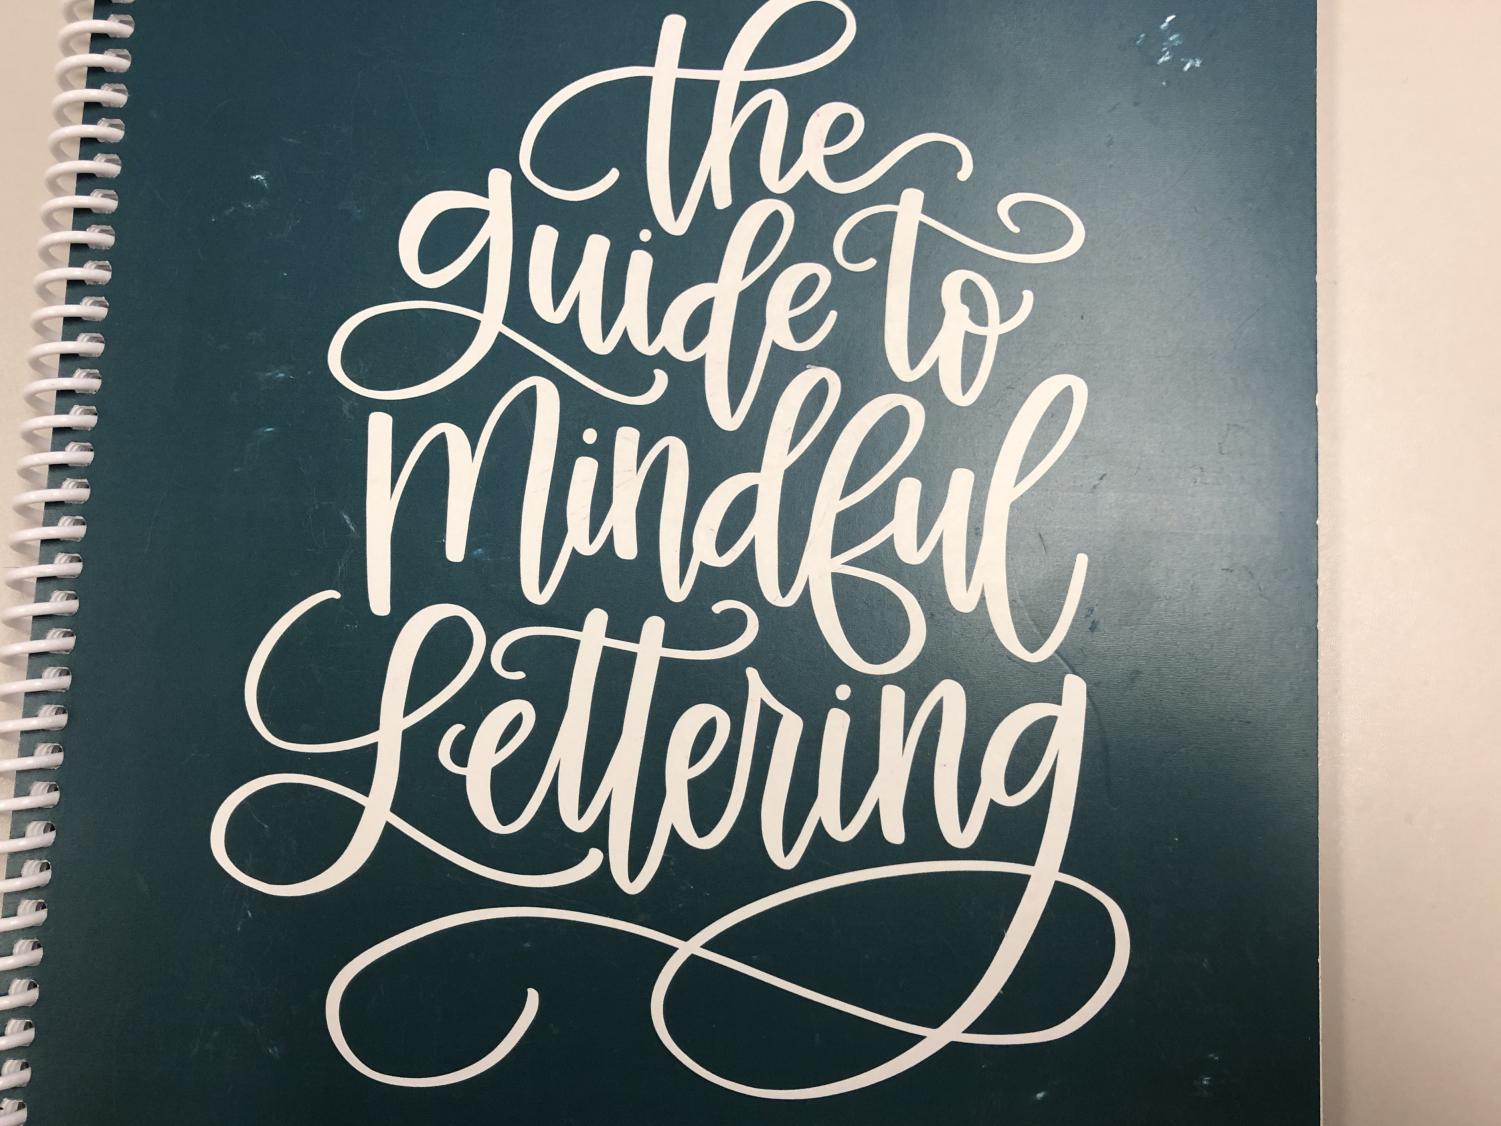
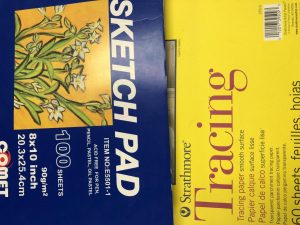
I started learning how to write in fancy lettering/cursive through a workbook called “The Guide to Mindful Lettering” by Lisa Funk which is an easy-use-book on how to letter and use the calligraphy pens. It is wise to purchase tracing paper, which can usually be found at any art store, and lay the tracing paper over the booklet and practice on it so that you do not ruin the book.
-
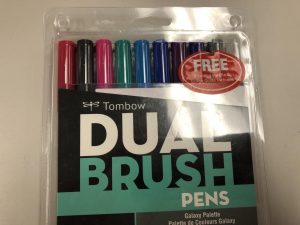
Pens: Here are some of the best pens to use for fancy lettering: -Faber Castell Pitt Artist Pen -Tombow Dual Brush Pen -Tombow Dual Brush Pen -Tombow Fudenosuke -Pentel Touch Sign pen -Copic Multiliner Pen -Crayola Markers (a cheaper alternative) I personally use Tombow Dual Brush pens as they have many different fun colors and are relatively easy to use. These pens are kind of expensive but Micheals has coupons which usually can be found online for in-store and online purchases.

-
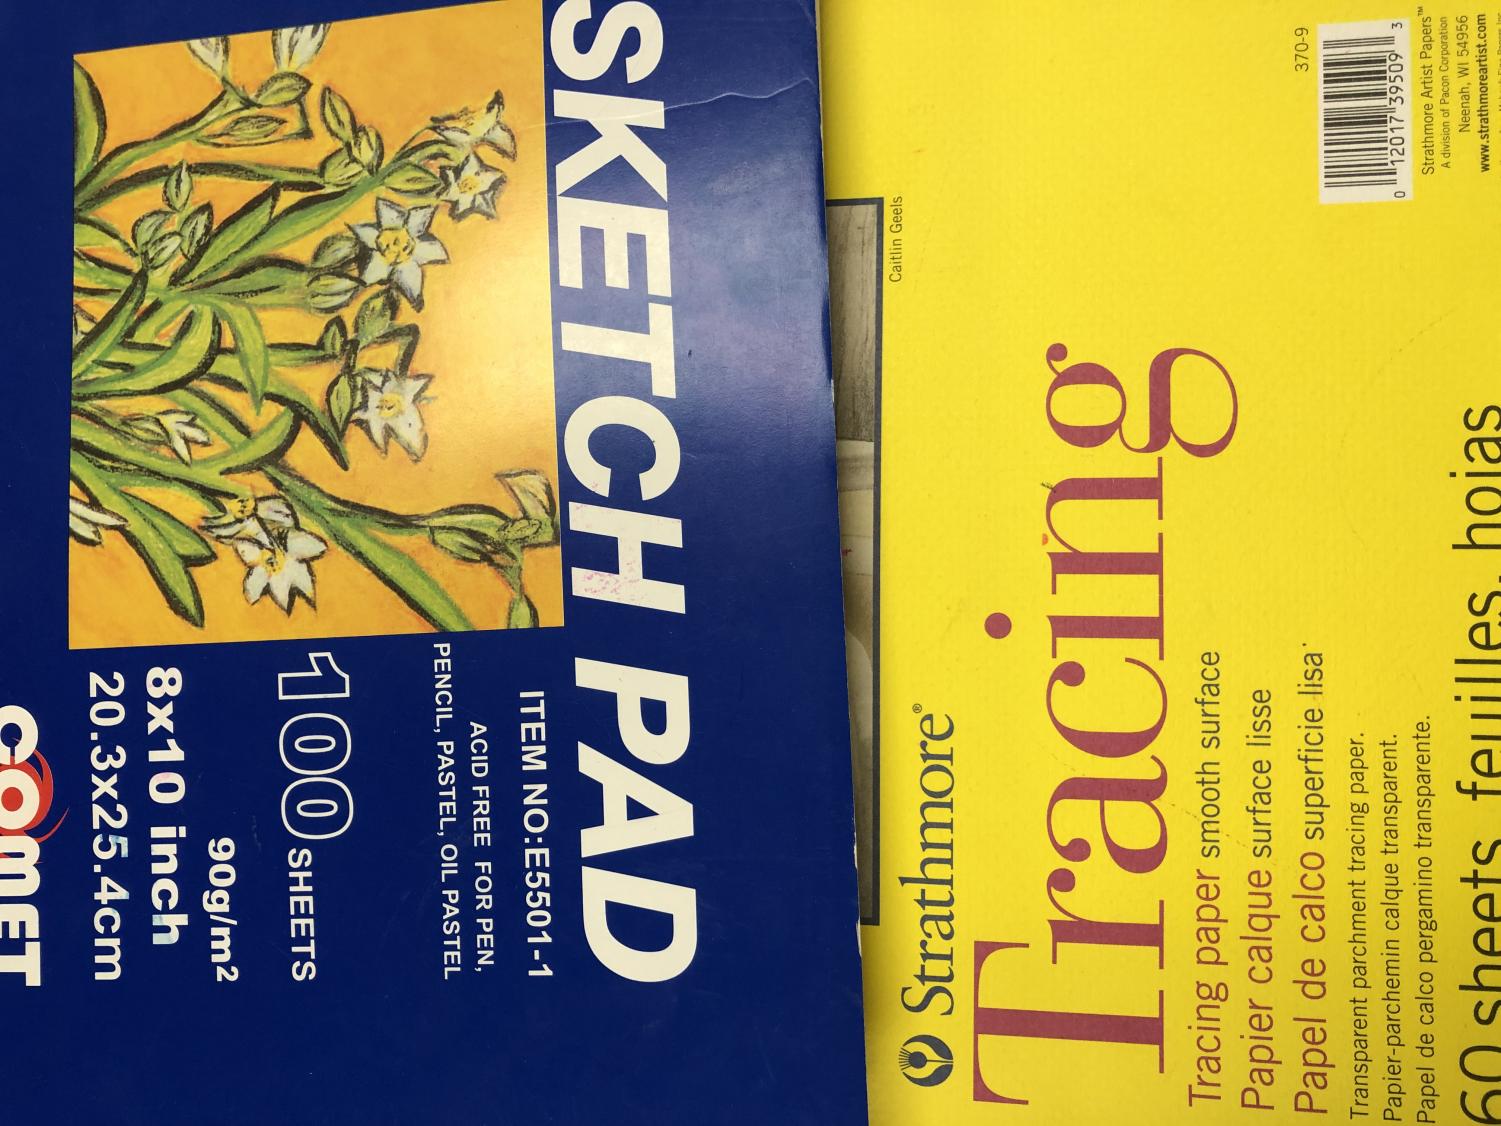
I am not really picky on what kind of paper I use, but sometimes the pens bleed through the paper. Copy paper from a printer is just fine for practicing and testing out the pens; however, “The Guide to Mindful Lettering” recommends paper such as: -Card Stock -Dot Pad -HP Premium Paper *Tip: It might be helpful to sit at the table while learning how to letter! Also, it is good to keep in mind that it is not going to turn out perfect at first.
-
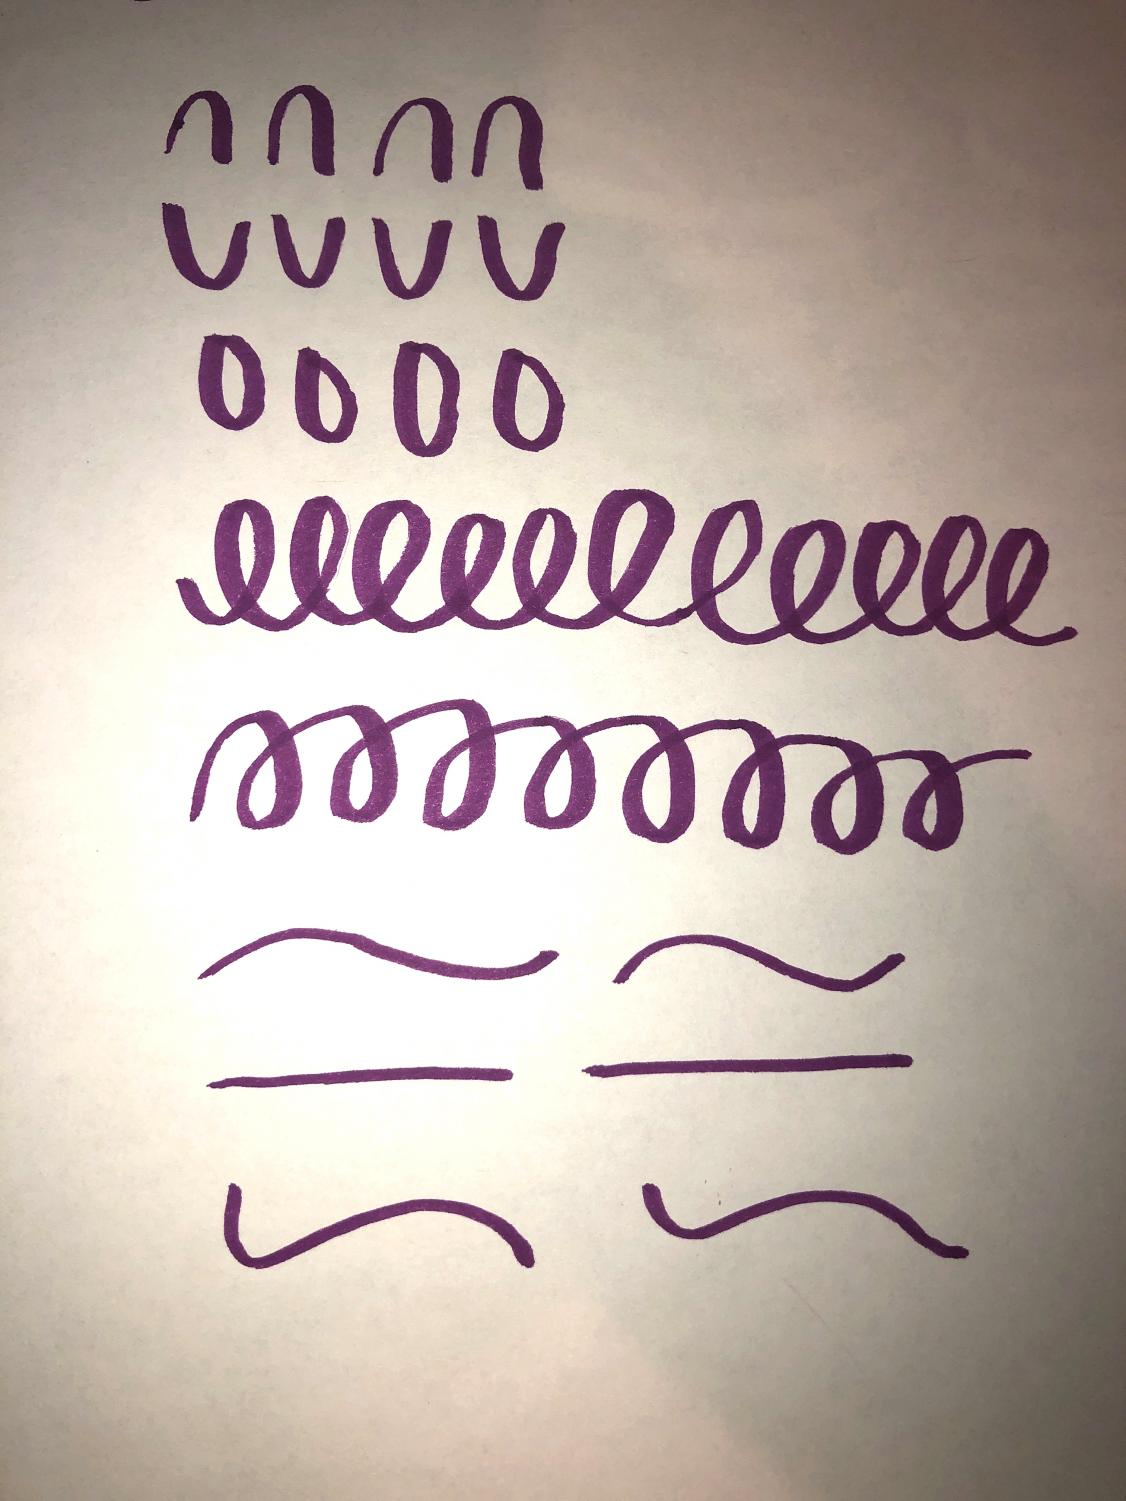
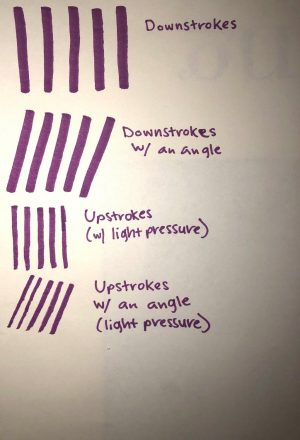
Warmup! Start by testing out the lettering pen with some DOWNSTROKES. You’ll want to put heavy pressure on the pen and pull the pen down on the paper to make a downstroke. Now, practice UPSTROKES using light pressure. UPSTROKES — Again but with a slight angle and light pressure.

-
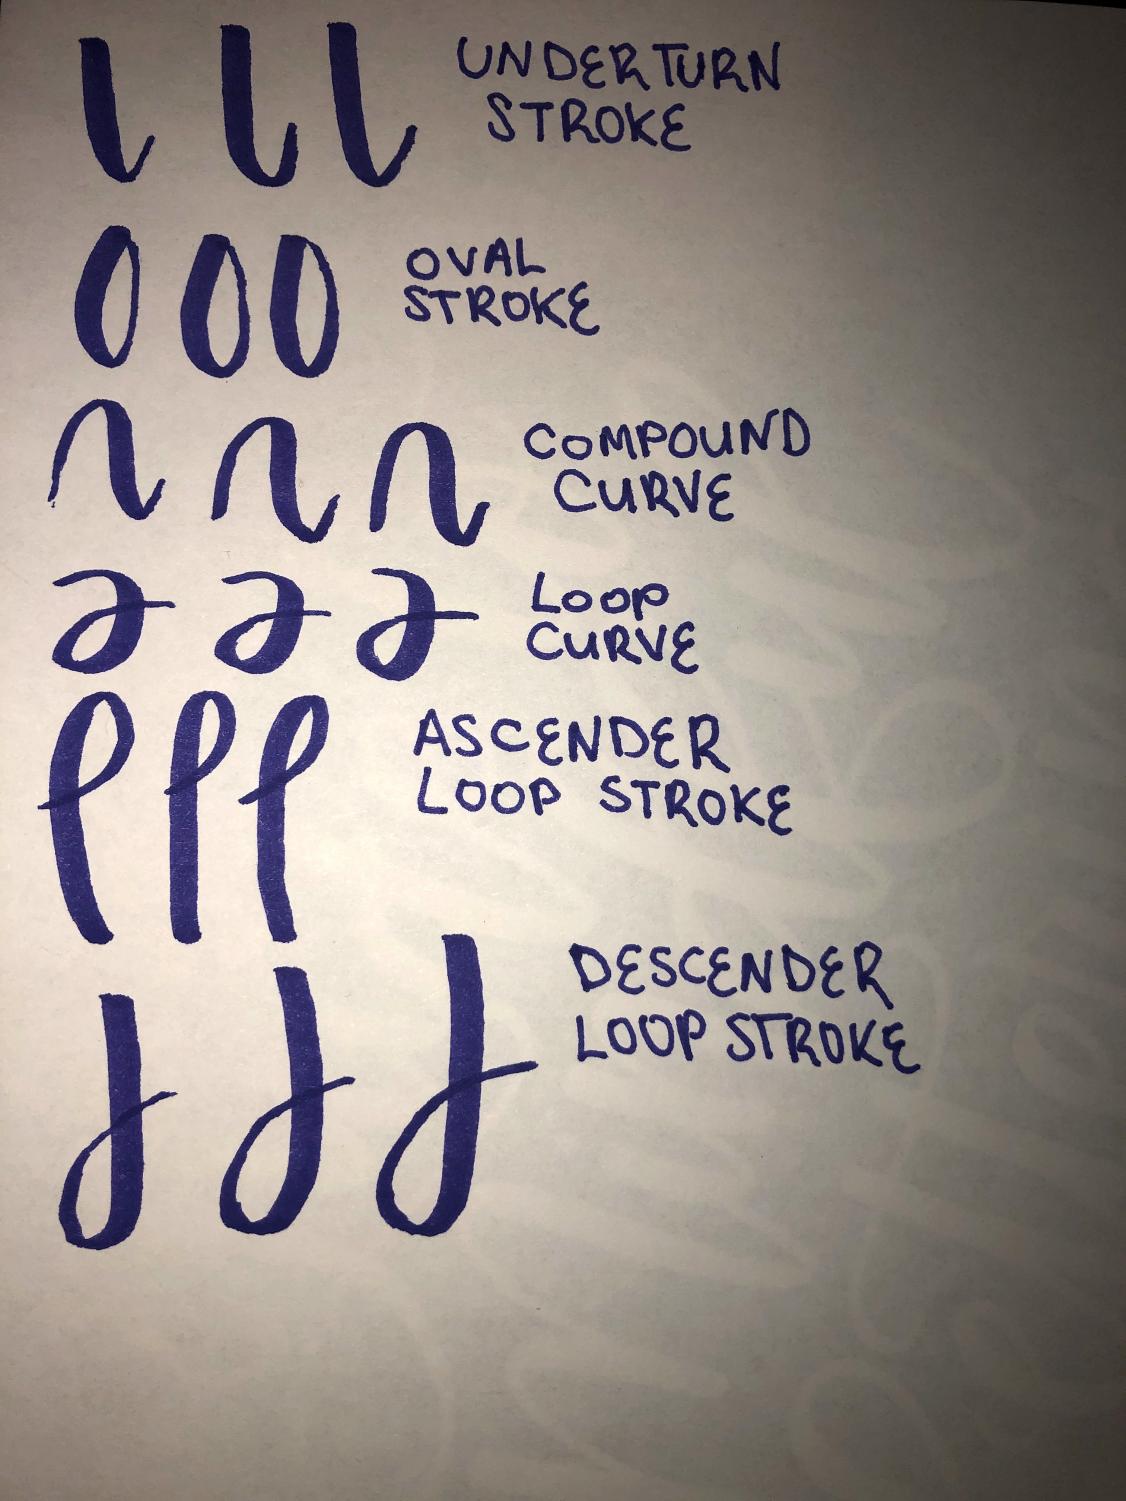
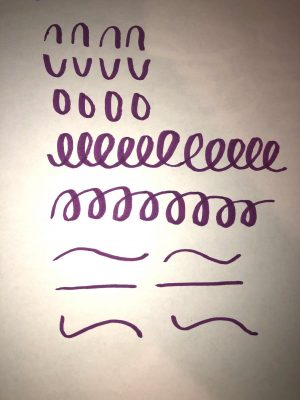
Here are some other types of strokes necessary for lettering.
-
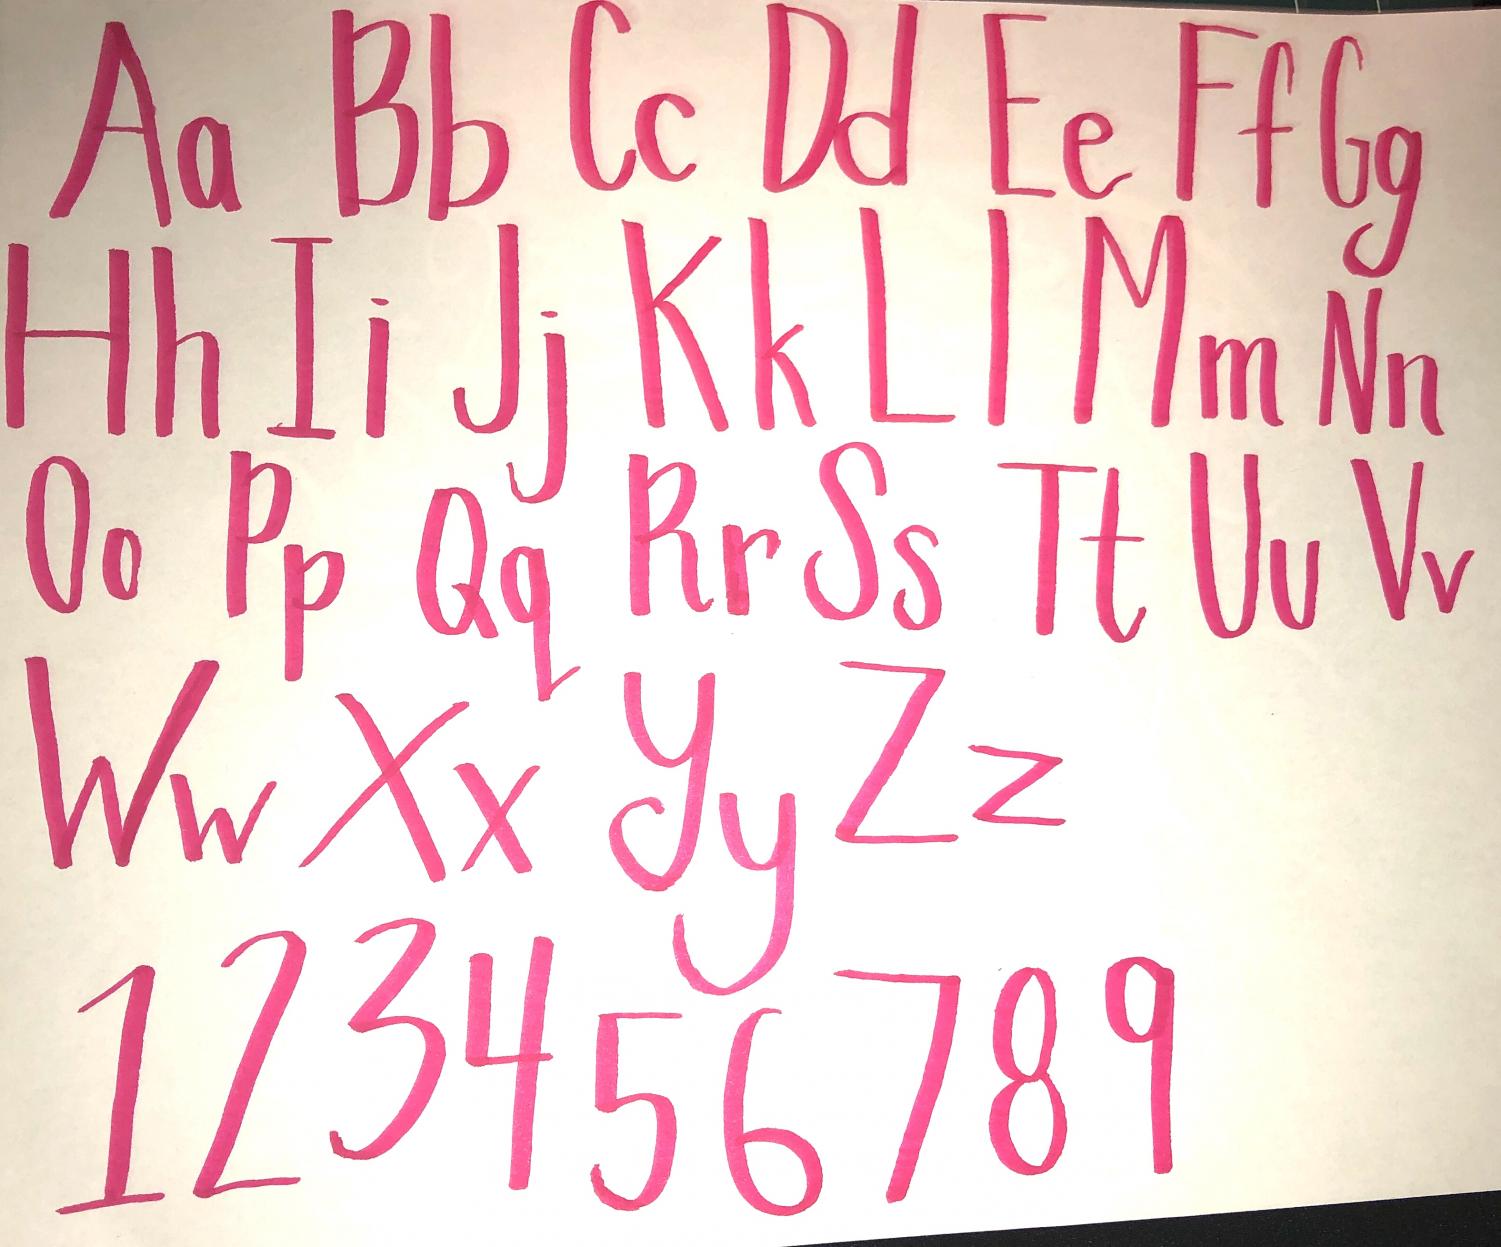
Print Basics: Let’s start out simple! Before moving on to cursive, we are going back to the basics with print. Write out the entire Alphabet in print to get used to writing out the letters.
-
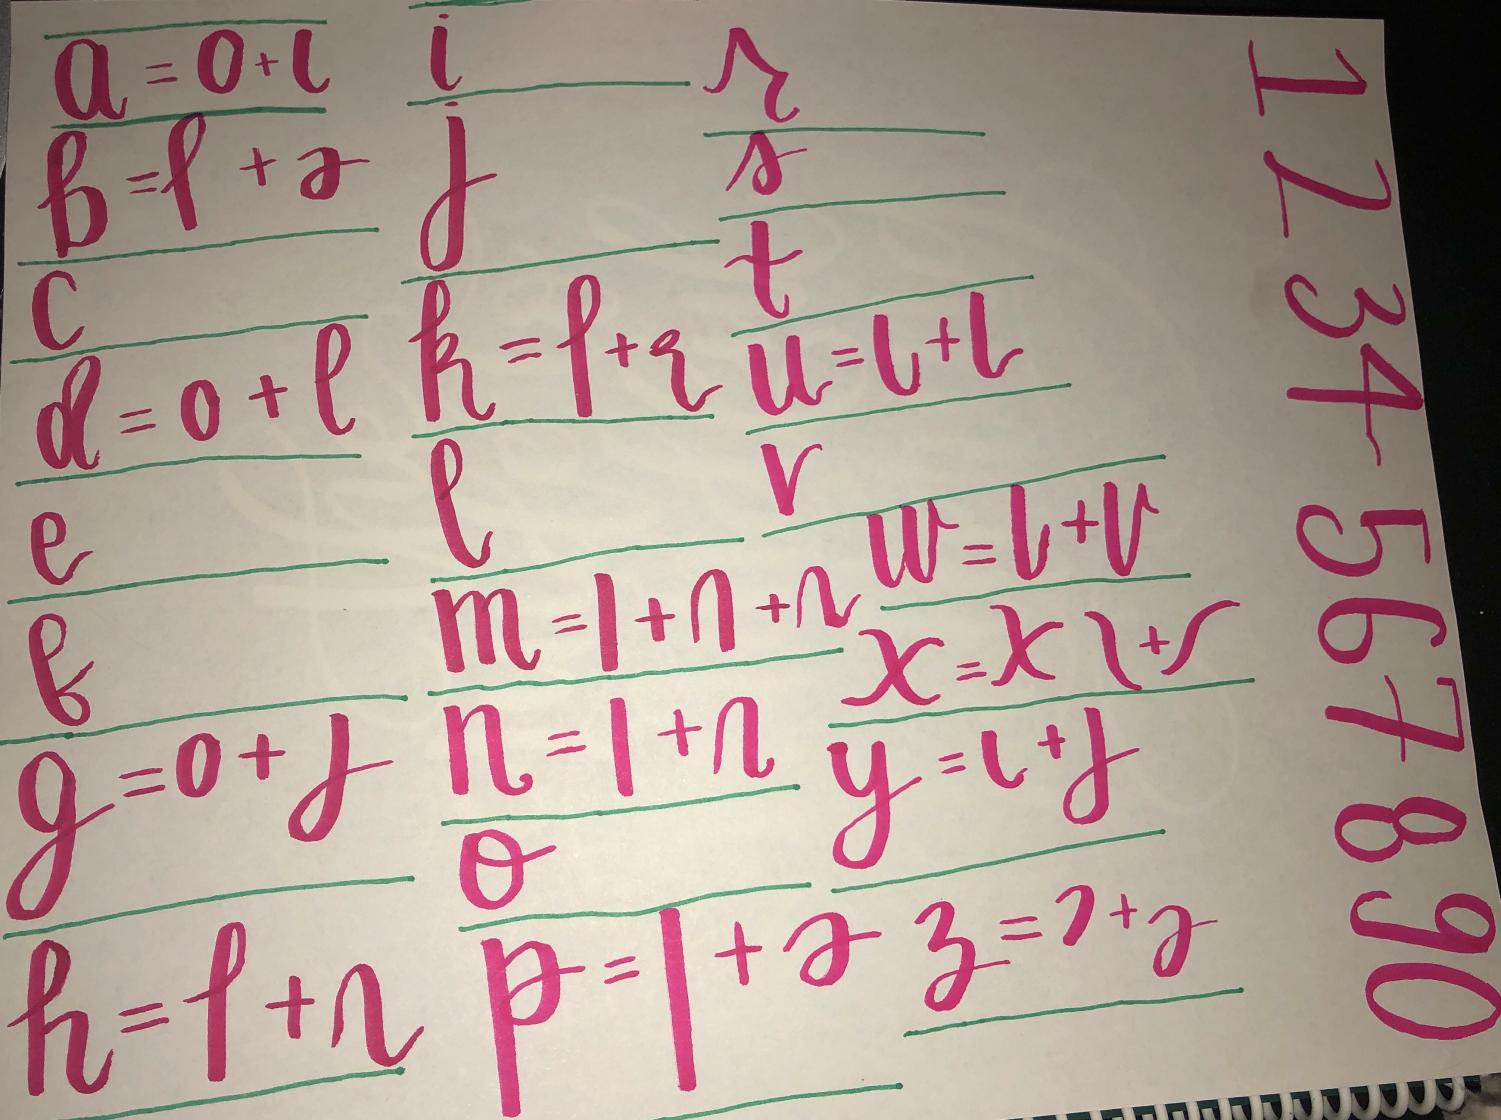
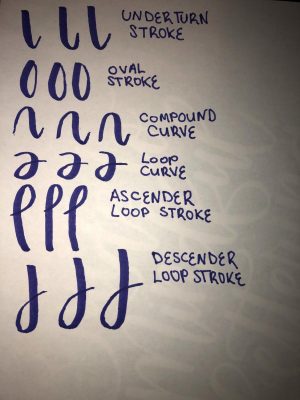
Putting All the Pieces Together There are several different strokes you’ll need to know in order to form the letters which can be combined to create many of these letters.
-
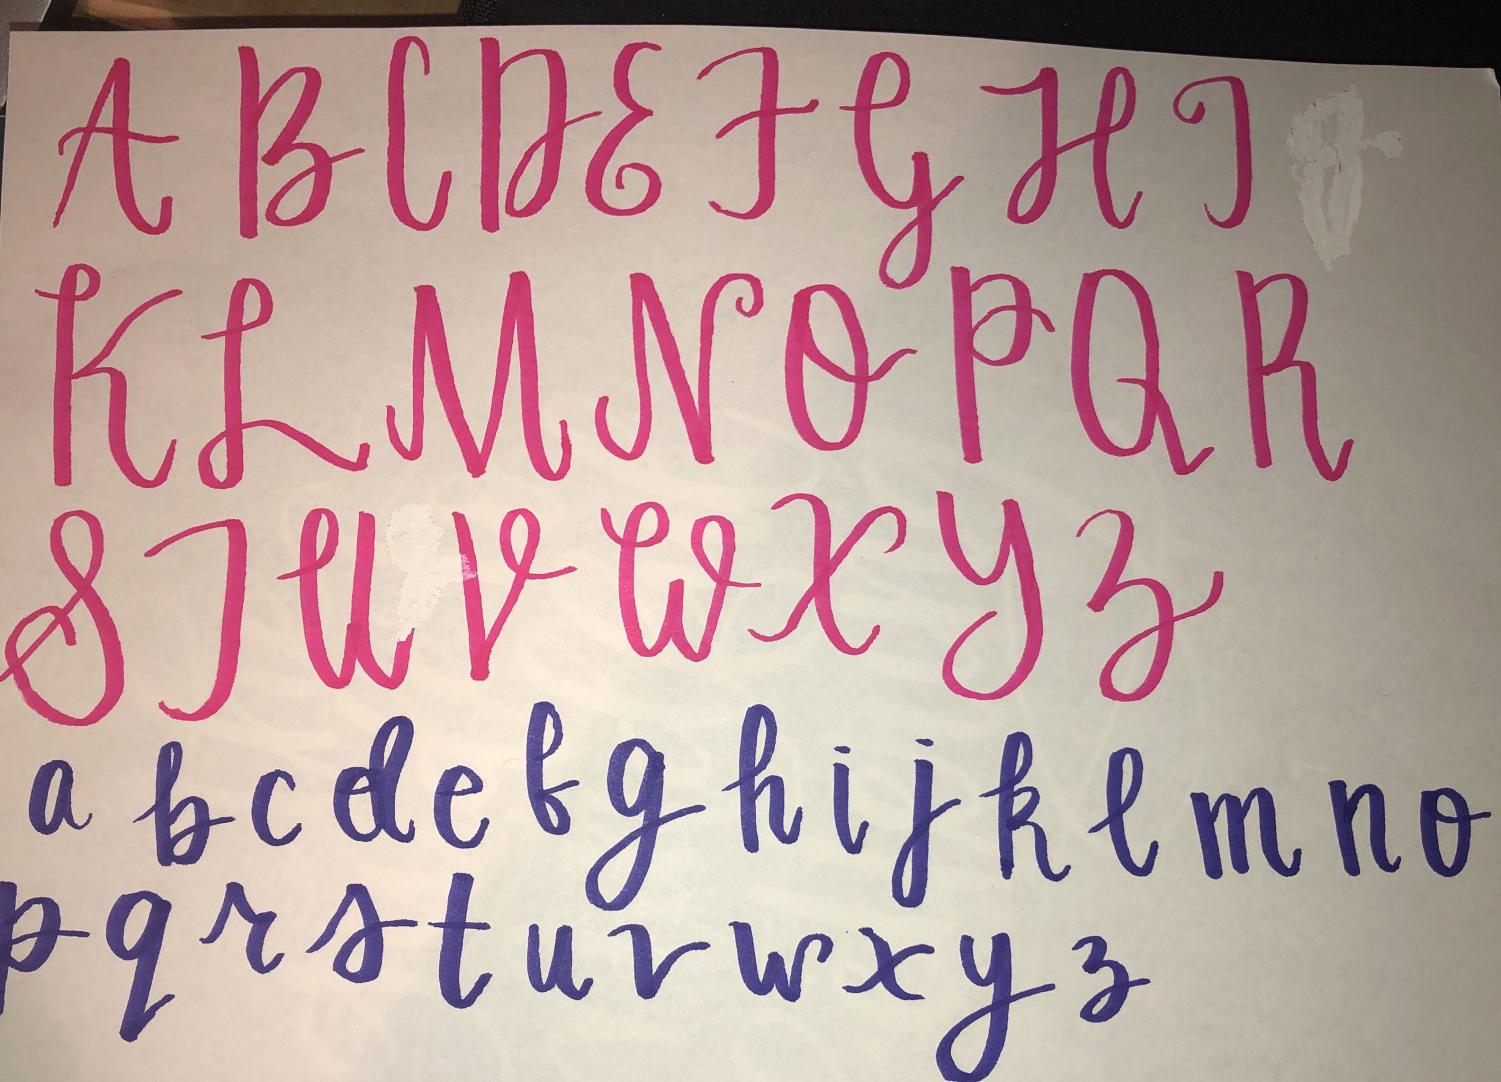
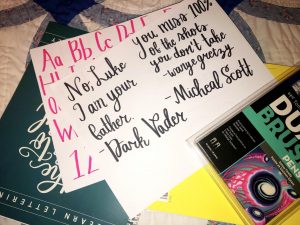
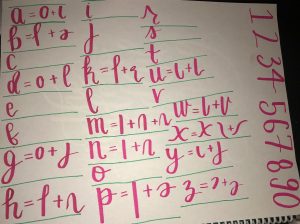
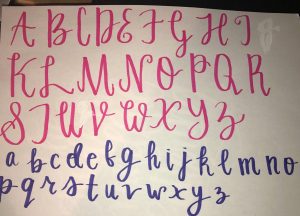
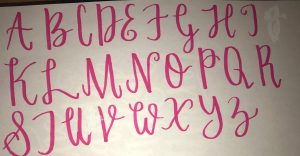
Script Alphabet We finally are moving on to the script alphabet! Keep in mind when first starting out it will not be perfect as it takes time and practice. Here are the lowercase script letters; as you can see, the strokes learned in the previous exercises are used to piece together the letters. It was very helpful for me to trace out the letters using tracing paper and Lisa Funk’s “Guide to Mindful Lettering.”
-
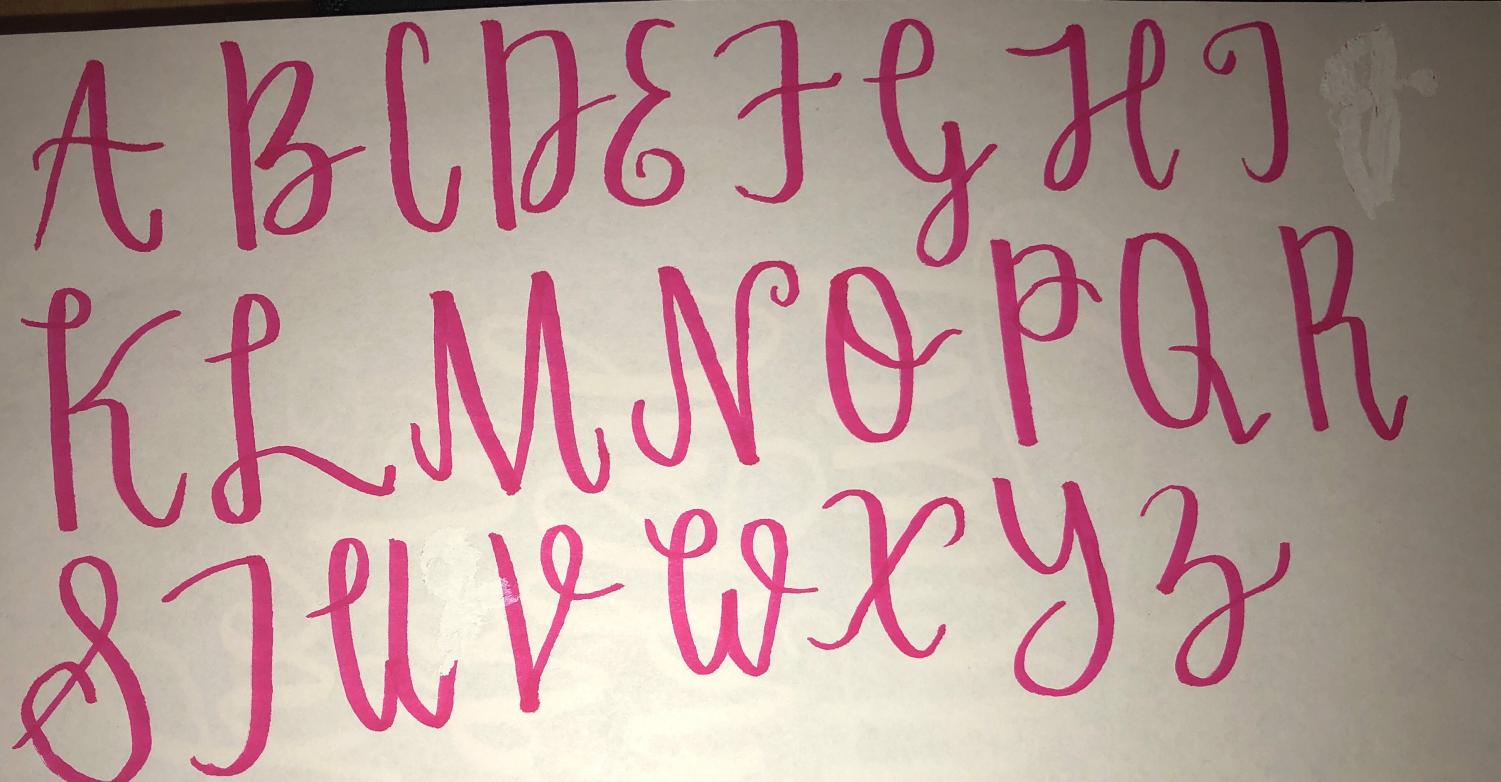
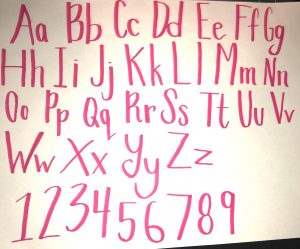
Here is a complete list of upper and lowercase letters in order for you to imitate.
-
Watching some Youtube videos is also another great way to learn how to letter and use calligraphy pens. Here are some videos I have found very helpful: https://youtu.be/A-uE297THTs (Tombow Dual Brush pen tutorial) https://youtu.be/38r7hjYK9vI (Crayola markers tutorial) Hand lettering takes a lot of time to learn, but it will come easy with practice! Moreover, you can develop your own style as your letters do not have to look like mine.


This will be my fourth and final year with the Raider Wire. I am the Editor-in-Chief along with Abby. I hope to actually become a real journalist one of...